A concrete slab installation is a foundational step in many construction projects, providing a flat, durable surface for various structures like patios, driveways, and even homes. It involves preparing the ground, pouring concrete, and finishing the surface to create a strong base that supports everything from outdoor living spaces to interior wood flooring.
Proper site preparation is essential for a successful installation. This includes checking the soil conditions, compacting the earth, and ensuring good drainage to prevent stress cracks and shifting. For large projects, such as patios or garages, reinforcement with rebar is often required to strengthen the concrete slab.
Concrete slabs are widely used for their versatility. They are ideal for radiant heat systems, adding warmth to floors in winter, and can also serve as a nonslip surface for areas like pool decks or walkways. A well-installed slab ensures longevity and resilience.
Preparing the Site for a Concrete Slab
Checking Building Codes and Permits
Before starting your concrete slab installation, it’s important to check with your local building department to determine whether a building permit is required. These regulations ensure that your installation complies with local codes, which may dictate specific slab thickness, placement, and reinforcement needs. Ensuring compliance will help avoid costly fines and delays. In most cases, obtaining a permit is a quick process, but it’s a crucial step that ensures the slab meets safety and quality standards.
Clearing and Measuring the Area
Once permits are secured, the next step is clearing and measuring the site. Measure from the lot line to position the slab properly and ensure it’s parallel to existing structures like doors or walls. Remove any debris, vegetation, or large rocks that could interfere with the installation process. Mark the corners of the slab by driving stakes into the ground, ensuring the area is level and square. This layout step is critical in creating a smooth, even foundation for the concrete slab.
Ground Preparation and Forming
Compacting the Soil and Adding Gravel
Proper ground preparation is essential to ensure the longevity of a concrete slab. Begin by compacting the soil underneath the slab area. A well-compacted base prevents stress cracks and shifting over time, providing a stable foundation. Loose or uneven soil can lead to slab failure, so using a plate compactor to firmly compress the ground is crucial.
After compacting the soil, add a layer of gravel. This not only promotes proper drainage, preventing water from accumulating beneath the slab, but it also helps in erosion prevention, which can weaken the foundation. A gravel bed, usually 4-6 inches thick, acts as a cushion that further stabilizes the concrete slab installation.
Installing the Forms
Once the gravel is laid, it’s time to install the forms, which will define the slab’s shape and size. Concrete nails are used to secure the forms in place, ensuring they don’t shift during the pour. To prevent the concrete from sticking to the forms, apply a nonslip surface or oil. This step ensures that, once removed, the forms leave clean edges. Finally, check that the forms are perfectly level, as any tilt or unevenness will affect the smoothness of the final concrete surface.
Pouring and Finishing the Concrete Slab
Pouring the Concrete
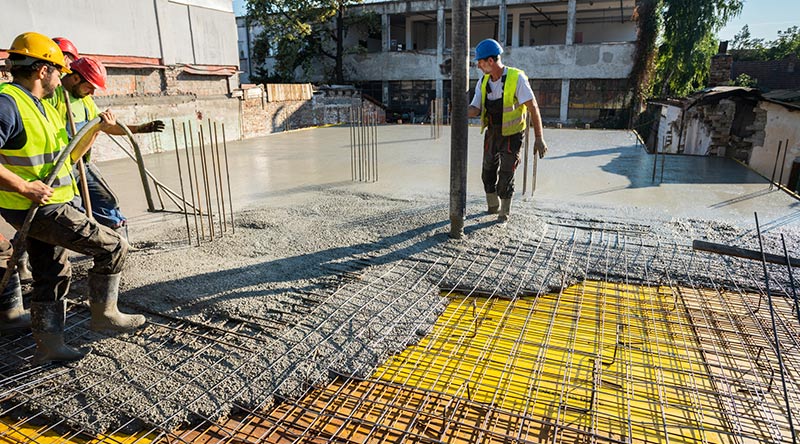
When pouring the concrete, ensure the mix is consistent and that it’s spread evenly across the forms. Start at one corner and work your way to the other side, continuously filling and compacting as you go. Using a level is critical throughout this process to make sure the concrete is even and smooth. Uneven areas can lead to weak spots that may crack over time, especially if the slab will experience heavy loads.
Filling the slab uniformly also prevents air pockets from forming beneath the surface, which could cause the slab to break under pressure. Make sure the concrete reaches the desired thickness, typically 4-6 inches depending on the intended use, and is spread evenly throughout the forms.
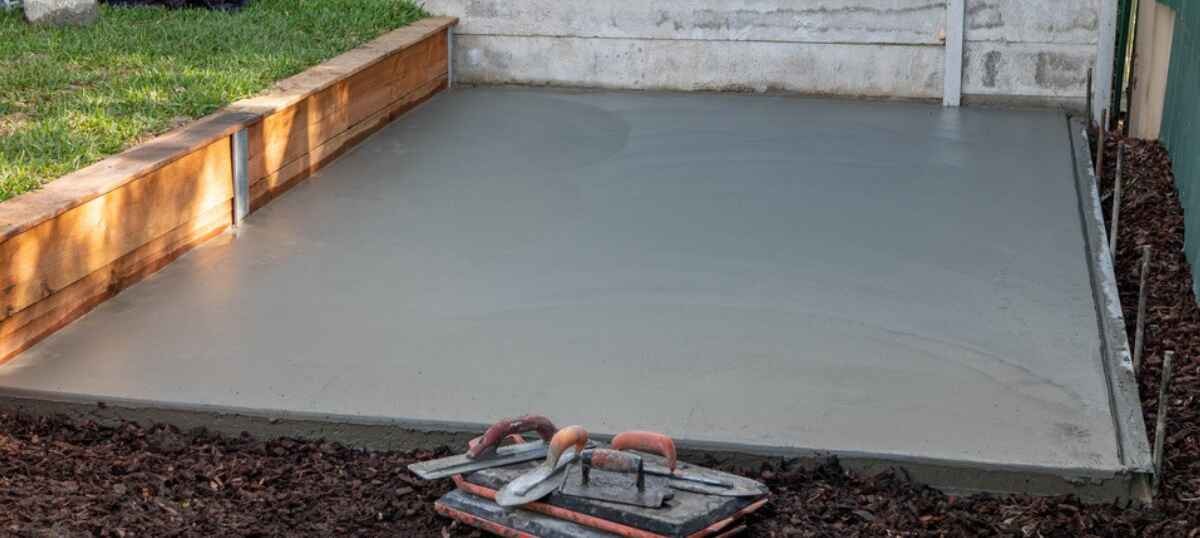
Using a Bull Float for Smooth Finishing
After the concrete is poured, the next step is to smooth the surface using a bull float. This tool helps to flatten the slab and push any trapped air or excess water to the surface. By removing these air pockets, you create a dense, strong slab that is less likely to develop cracks. The bull float should be moved in a back-and-forth motion, keeping the surface flat and uniform.
Smoothing Edges and Adding Finishing Touches
Once the slab is leveled, focus on the edges. Use an edging tool to round off the slab edges, which helps prevent future cracks and chipping as the slab expands and contracts with temperature changes. If you’re incorporating a radiant heat system within the slab, now is the time to install it, ensuring it’s properly embedded in the concrete without affecting the slab’s thickness or finish. Finally, let the slab cure properly for a strong, durable finish.
Determining Concrete Slab Thickness and Reinforcement
Choosing the Correct Thickness
The thickness of a concrete slab plays a crucial role in determining its durability and load-bearing capacity. For light-duty applications, such as walkways or patios, a standard slab thickness of 4 inches is typically sufficient. However, if you’re installing a slab for a deck or patio that will support heavier structures or furniture, a thickness of 5-6 inches is recommended to ensure longevity and stability.
For areas subjected to heavy foot traffic or vehicle loads, such as driveways or garages, increasing the slab thickness to at least 6 inches is essential. Proper assessment of the slab’s intended use will help you choose the appropriate thickness, ensuring that it can handle the expected load without cracking or shifting.
Reinforcing the Slab with Rebar
To further enhance the strength of the concrete slab, adding rebar is a standard reinforcement technique. Rebar helps distribute weight across the slab, reducing the likelihood of cracks caused by heavy loads or soil movement. Install the rebar grid evenly, following the spacing and tying methods recommended by the manufacturer’s instructions. For most residential applications, placing the rebar in a 12-18 inch grid pattern is sufficient. Securely tie the rebar to prevent shifting during the pour, ensuring that it sits slightly above the base of the slab for optimal support.
Installing Concrete Slabs for Different Uses
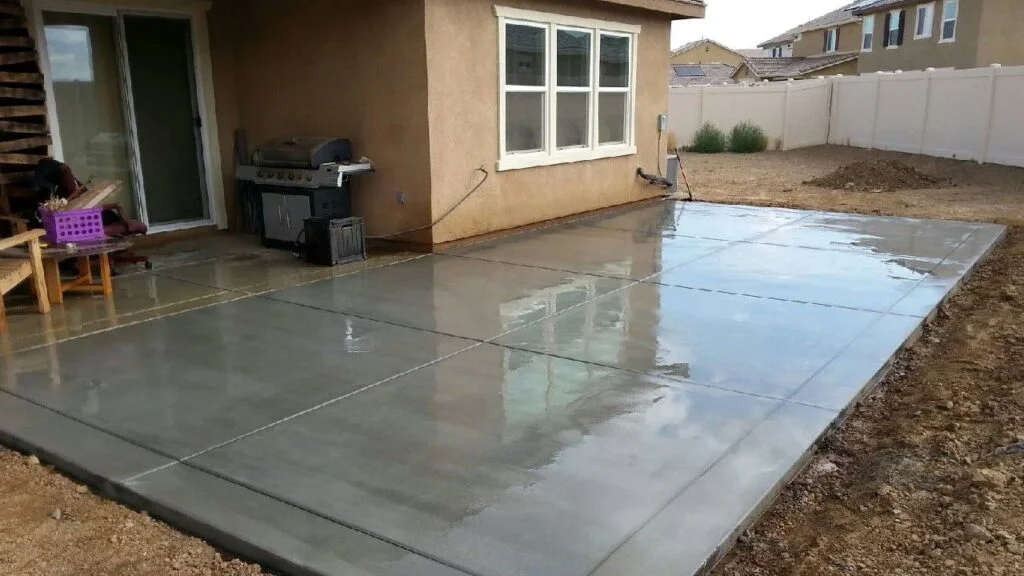
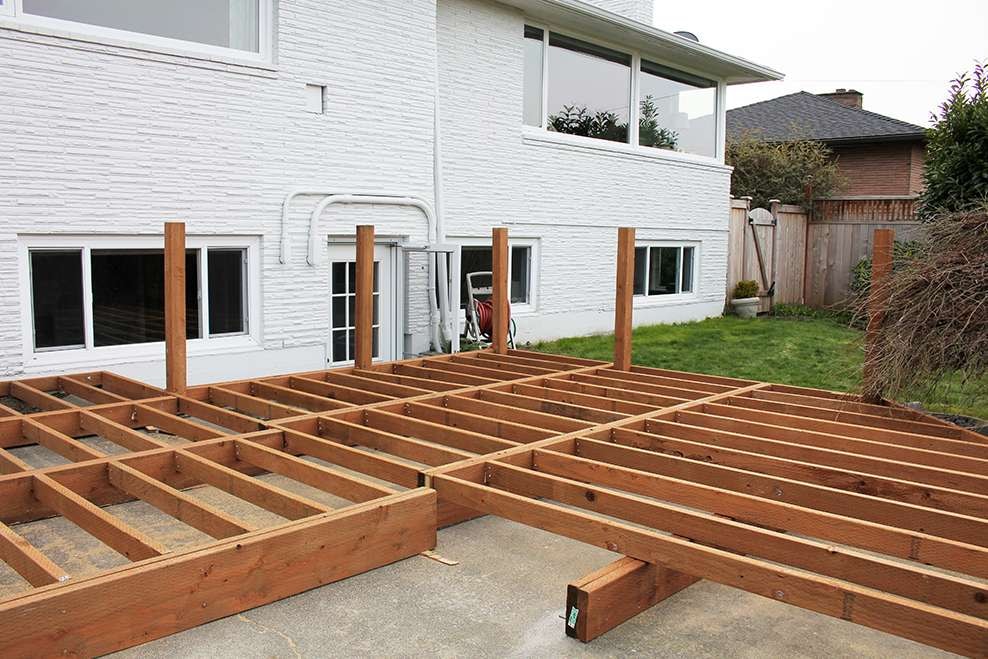
Concrete Slab for Patios and Decks
When installing a concrete slab for a patio or deck, it’s important to ensure the slab is thick enough to support the weight of the structure. For patios, a 4-6 inch slab typically works well, but for decks, especially those designed for outdoor furniture and heavy foot traffic, the slab should be at least 6 inches thick. Additionally, consider applying a nonslip surface to the slab to improve safety, especially in areas prone to rain or wet conditions, like around pools.
Concrete Slab for Wood Flooring
For wood flooring installations over a concrete slab, moisture control is a top priority. Concrete naturally absorbs moisture, which can be damaging to wood over time. Before installing wood floors, make sure the slab is fully cured and dry. Use a moisture barrier, such as plastic sheeting or a vapor barrier, to prevent moisture from seeping up through the concrete and affecting the wood flooring. Proper moisture control is key to preventing warping or rot, ensuring a long-lasting wood floor installation over the concrete slab.
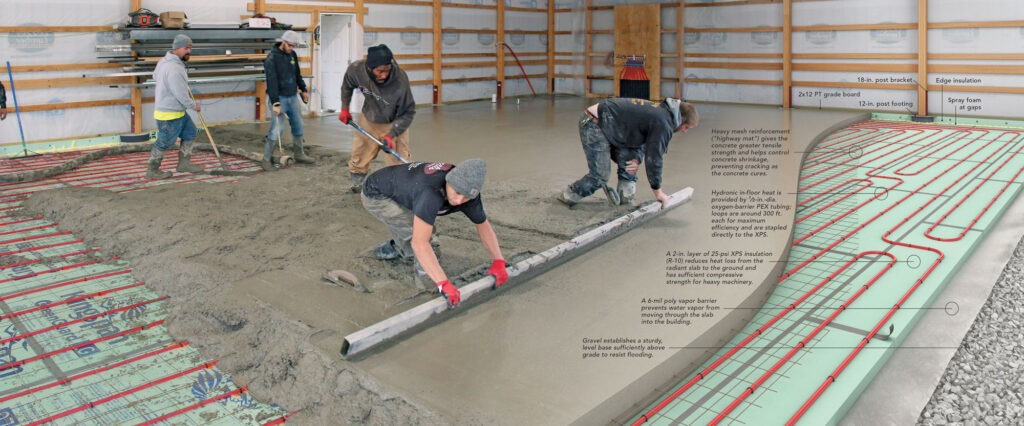
Radiant Heat Concrete Slabs
Radiant heat systems are an increasingly popular option for concrete slab installations, especially in colder climates. To install radiant heat, the heating elements or water tubing must be laid out within the slab before pouring the concrete. This setup provides winter warmth by heating the slab from within. Be sure to adjust the slab thickness accordingly, typically requiring an additional inch of concrete to protect the heating system. The even distribution of heat also helps reduce energy costs while providing a comfortable living space during colder months.
Ensuring a Long-Lasting Concrete Slab Installation
A successful concrete slab installation requires careful preparation, proper thickness, and reinforcement. Regular maintenance—such as sealing and repairing minor cracks—ensures the slab’s durability and extends its lifespan. By following these best practices, your concrete slab will remain stable, attractive, and functional for years to come. Taking the time to prepare the site and reinforce the slab will ultimately save you time and money in future repairs.
Call to Action
Ensure your concrete slab installation is done right the first time by partnering with a professional. Whether you’re installing a patio, wood flooring, or incorporating a radiant heat system, proper preparation and maintenance are key to long-lasting results. For high-quality materials and expert installation, trust RJT Construction, a top industrial concrete company in Houston.
Contact us today for a consultation and get started on your next concrete project with confidence. Let our expertise provide you with a durable, reliable concrete foundation built to last!


